
Use promo code “SKY95OPENVPN” to save 95% off your first month. Offer is valid for new users only.
How does one keep their network activity secure? One of the solutions to this pressing issue is OpenVPN, a virtual private network. Users can transfer and request data while connected to a public network, as though they are connected to the private network. Therefore, once a VPN is set up and you navigate to google.com and type in “what is my IP“, you will see that your IP would match that of your private server. While this technology is nothing new, learning how to install OpenVPN on Linux to setup and utilize it is an invaluable skill.
Part 1: Setting up your Linux VPS and Client Software
For this stage of the process, you will need to gain access to a Linux machine to install an OpenVPN server.
1a. Turnkey, or no Turnkey? (Optional)
In addition to a Linux VPS, SkySilk also offers a Turnkey OpenVPN template. What this does is allow for simple deployment of a lightweight, easy-to-manage OpenVPN server in just a few clicks. While this process is no doubt easier than a traditional way to install OpenVPN, having a custom Linux OS environment certainly provides vast benefits of its own. However, if you’d like to setup your own Turnkey OpenVPN server, the button below will take you to your SkySilk login (Or to create an account if you don’t already have one).
1b. Deploying a Linux VPS
If you already have a SkySilk Linux VPS you may skip this step. Otherwise, you will either need to create and account, or deploy a machine first. To create a VPS, follow these simple steps.
1. Select “Create VPS” and choose a plan
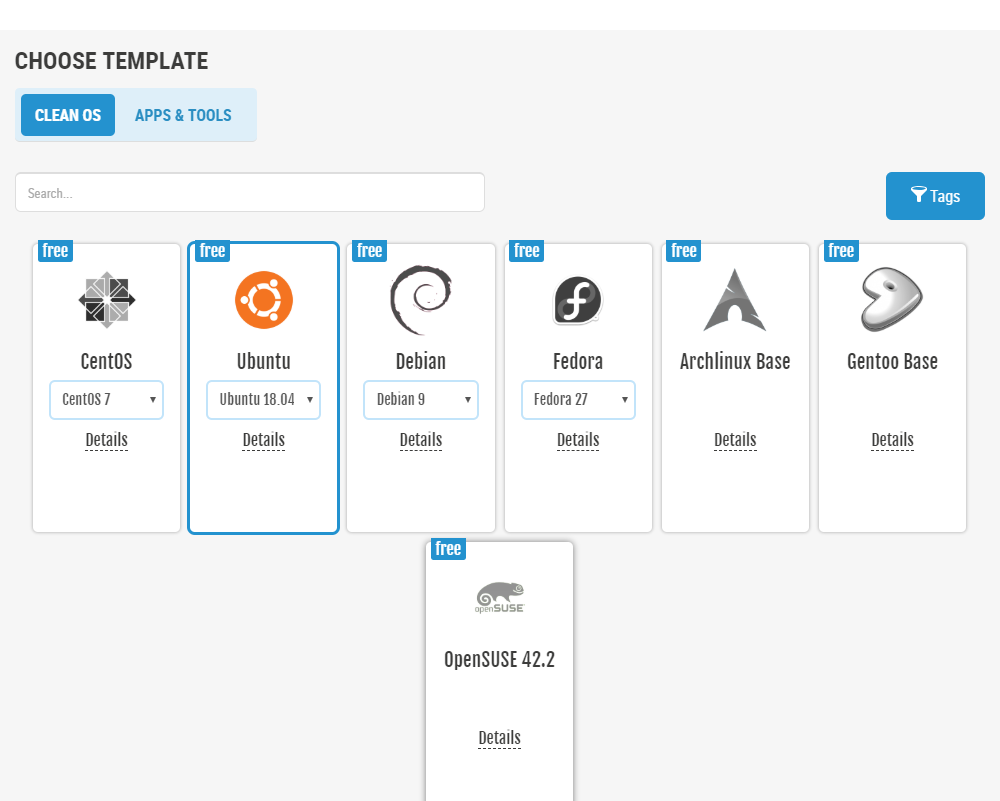
Once logged in, navigate to your VPS dashboard and select “Create VPS”, followed by your resource plan selection.
2. Deploy a Linux VPS
For purposes of this guide, we will select Ubuntu 18.04 as the Linux OS.
After selecting Ubuntu, simply enter your server name, password (or have it automatically generated) and SSH key(s) if you have any. Once this is complete, your VPS will begin to deploy. When the server is deployed, select “SSH Console” on your dashboard or SSH into your server using the terminal (if on a UNIX like machine) or Putty if you’re on windows. Congratulations, you now have your own Linux VPS set up (wasn’t too hard right?).
1c. Install FileZilla and OpenVPN GUI
Next we will need two more pieces of software – FileZilla (to transfer the configuration file to our server) and OpenVPN client (a desktop client used to connect with our VPN). No need to worry about signing up for anything or emptying your wallet as these are completely free to use. Continue through the installation process as you normally would with these programs (While also selecting the proper install for your OS).
1. Install FileZilla
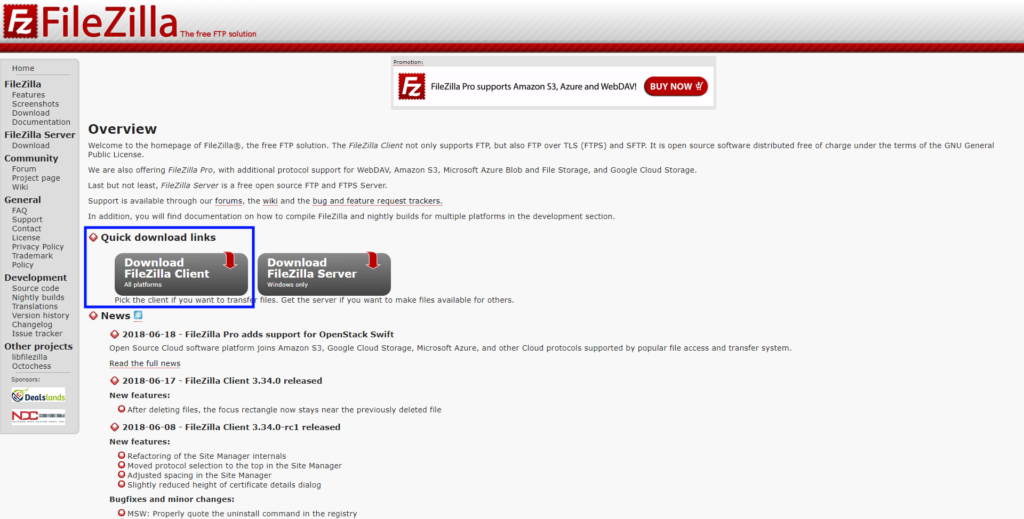
FileZilla is an FTP (File Transfer Protocol) solution you can use to transfer files between a client and a server on a network.
Go to the FileZilla download page and grab a copy of the client. The page should look something like this:
2. Install OpenVPN GUI Client
Next, repeat the same process, but with installing the OpenVPN desktop client here. The download page should look like this (Make sure to select the right download for your system):

Now we have everything we need in order to have a fully functional VPN up and running in a few minutes.
Part 2. Time to Install OpenVPN
2a. Install OpenVPN
Primarily we want to ensure that the system is up-to-date so we will run the following commands:
sudo apt-get update
sudo apt-get upgrade
These will update and upgrade the software on your VPS.
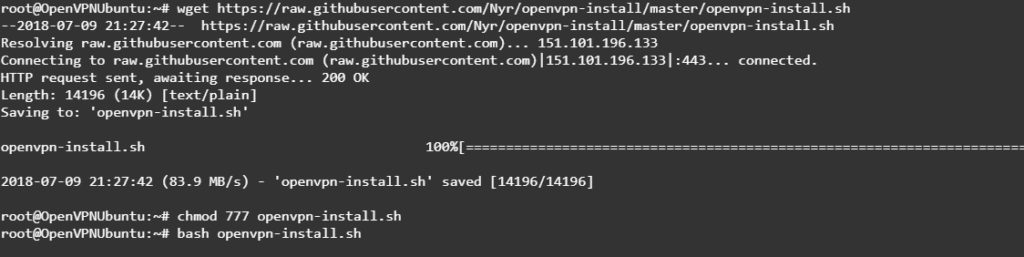
Now we need to install OpenVPN itself. Type the following command into the terminal. (wget is simply a command that is used to download files from the internet):
![]()
wget https://raw.githubusercontent.com/Nyr/openvpn-install/master/openvpn-install.sh
This will fetch the download from the hosted github repository.
2b. Enable TUN/TAP
Before going any further, TUN/TAP must be enabled. We can do this in just a few steps.
The following script will enable TUN/TAP

Once done, simply type “cd” again into the terminal in order to return to the root directory.
In order to configure your VPS so that TUN/TAP will be enabled automatically every session you can follow this guide. Otherwise, you will need to enable TUN/TAP every time you start a new session.
2c. Configure the OpenVPN VPS
Now we will need to give permissions to the openvpn-install file and run it. Type in the following commands:
chmod 777 openvpn-install.sh
bash openvpn-install.sh
You will now be asked a few questions to configure your OpenVPN VPS:
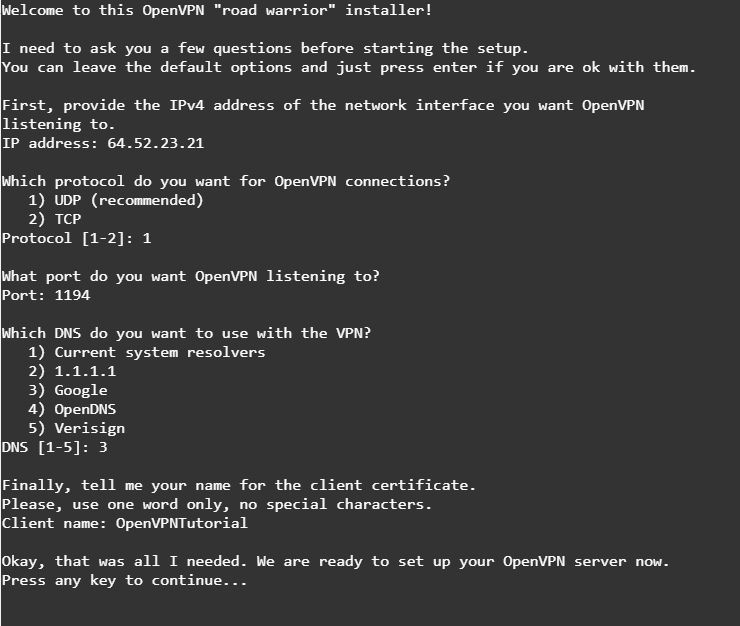
Your IP address will show here, press enter.
Type in “1” to use UDP protocol, press enter.
We are going to use port 1194 (This is default), press enter.
For purpose of this tutorial we will use the Google DNS, so type in “3”, press enter.
Next, the client name will act as your “username” – call this whatever you want and press enter.
We are now ready to set up the OpenVPN server and can press any key to continue.
Part 3. Transfer the Configuration File
Now we are ready to grab our OpenVPN configuration file from the server.
3a. Using FileZilla for the Configuration File
Open FileZilla and in the inputs at the top use the following values:
for Host: <This is your OpenVPN (Linux) server IP>
for Username: <this will be “root”>
for Password: This will be your server password that you set upon deployment
for Port: 22
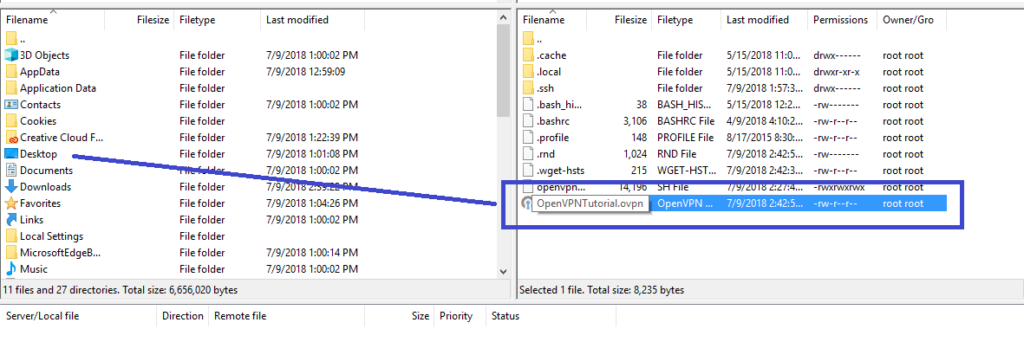
Once connected to our server, you will see an OpenVPN config file which is named after the “client name” we input earlier during the configuration stage. In this case, the client name is titled “OpenVPNTutorial”. Next, to easily find this on our local machine, drag the file onto your desktop. (You can place this anywhere, just remember the file path):
3b. Connecting to the OpenVPN server
Now that we have the configuration file (the .ovpn file) on our local machine, we can then add it to the OpenVPN GUI Client. To do this, open the software from app menu or search bar on your computer.
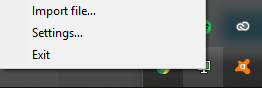
Upon first launch, you may get an error message that tells you something along the lines of “no configuration file found” because we haven’t imported the proper file yet. This is where our new .ovpn file comes in handy. To import this file is trivial. First, right click the OpenVPN GUI icon in the taskbar and select “Import file…” (Looks like a computer with a lock on it; May appear different for UNIX machine users):
Next, navigate to where you saved the configuration file and then select “Open”:

And that’s it! the client should now automatically connect you to the server. You should see a notification pop up letting you know that you are now connected as well. Now we can navigate back to google.com to confirm that everything is working. Search “What is my IP address” and you will now notice that your IP matches that of your server. Happy browsing!
To Disconnect: Just click the same Icon in your taskbar and select “Disconnect”.
Further benefits of an OpenVPN VPS
Aside from masking your IP, a VPN provides a flurry of other benefits in order to keep you protected. Let’s pretend you decide to get your work done at Starbucks and connect to their public Wi-Fi. Because of this, your information could be exposed to anyone on that network. When connecting through a VPN, none of this data can be intercepted because it is being accessed through the private network.
Additionally, you can use a VPN to access otherwise-blocked content on the web. For example, certain countries block particular websites or YouTube videos. However, one can access this content using a VPN. Regardless of what you use an OpenVPN VPS for, it never hurts to stay more protected in a world where data theft and mining is something that could inconvenience anyone at any time.
Use promo code “SKY95OPENVPN” to save 95% off your first month. Offer is valid for new users only.
READ FURTHER:
Difference between a VPN and a Proxy Server


