
A Discord bot can provide invaluable functions to your public chat server. Whether you want to play music while you game, send memes to your friends, or more importantly (perhaps) automate server administrative tasks, learning how to host a discord bot will prove more than useful. In theory, you could program it to do whatever you’d like if you’re an experienced programmer (and know discord.js well, of course). This guide will allow you to learn how to host a Discord bot using a Node.js server and the discord.js package.
How to Host a Discord Bot
Hosting a Discord bot is quite easy and doesn’t require much web programming knowledge (or any at all for that matter!). If you follow the steps concisely, you should have your very own Discord bot VPS up and running in under 10 minutes.
Now, this isn’t to undermine the power of learning JavaScript and Node.js in order to customize your bot a whole lot more. Though, for basic purposes, the code provided here will give you a nice boilerplate.
For this project we are going to need 3 things:
- A SkySilk account (For the Node.js VPS; if you don’t already have a SkySilk account you can sign up here)
- A Discord account (To create the bot app)
- FileZilla (An FTP client to transfer our JavaScript to the server. Note: There are other methods of FTP and SFTP so you may use your preferred method if you’d like)
Don’t worry about preemptively downloading anything though, as each step will walk you through setting everything up (with the exception of a discord account which is presumed you will have at this point). Without further ado, let’s learn how to host a Discord bot.
Part 1. Create a new Discord App
First and foremost, it is under the implication that anyone who’s ended up at this article already has a discord account. Go to this link or copy and paste this URL https://discordapp.com/developers/applications into your browser **(It may prompt you to sign in if you haven’t already).
Initial App Setup
Once there, you’ll see a button at the top right labeled “New Application”. Select this to begin building your Discord bot:

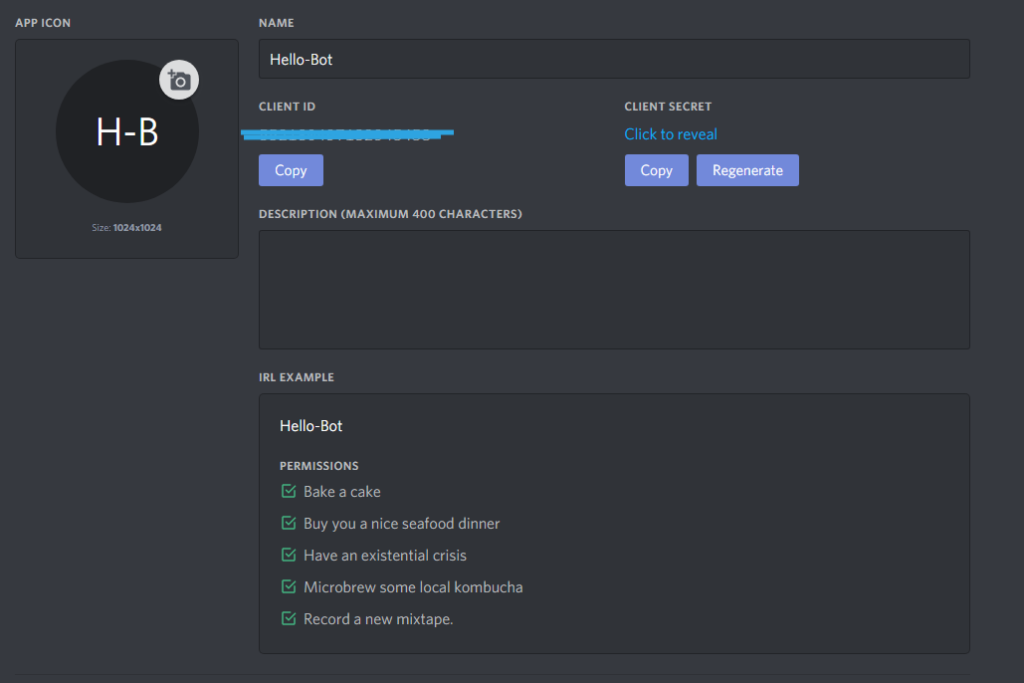
Once you’ve selected New Application, you will see a form to fill out. Name the bot anything you’d like – for this guide, I will be naming the bot “Hello-Bot” and programming it to say “Hello World” whenever the user types “Hi Bot”.
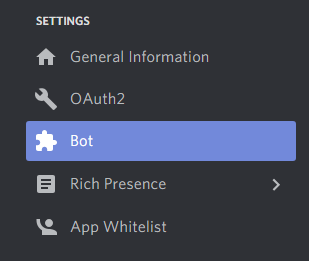
Next, for our application, we want to create what’s called a “bot user”. To do this, simply select the menu option labeled “Bot” which can be found on the left-hand side of the page.
Once in this submenu, there will be another button labeled “Add Bot”. Select this and you’ll have successfully added a bot to your Discord application!
Now before authorizing our bot and adding it to our server, let’s set up the Discord bot VPS where we’ll be hosting it from.
Part 2. Setting up the Node.js Server
We will need to set up a Node.js server using a Turnkey template in order to host the Discord bot VPS. Continue to login to your account and select “Create VPS”. If you don’t already have a Skysilk account, follow the link below. Once you have done so you will be able to follow this guide step-by-step.
Deploying a Node.js VPS
Once in the VPS configuration section, choose a plan and continue down until you see Apps & Tools:
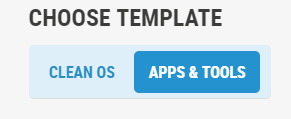
From this list, select the Node.js template which will look like this:
You will then need to configure the name, password, and SSH keys (If any) for your VPS. Take note of your password.
Once the VPS is deployed you will be brought to your VPS dashboard and can then access your Node.js server. Select the SSH Console button on your dashboard or SSH into your server to begin the primary setup.
Please note that on any newly created SkySilk server, the default username is root. Simply hit ‘enter’ when your SSH terminal is open and you will be prompted to enter your password which was set up at creation.
This will be a short process in which you enter your admin email and install security updates. After this process, we will now be ready to initialize our app.
Preparing the Server
Now the server needs to be configured so that we can use Node and discord.js together. First, let’s create a directory titled “DiscordBotApp” using the command mkdir DiscordBotApp (This can be titled whatever you’d like and simply just a folder to store our files for organizational purposes) and then hit enter.

Next, cd into the newly created directory using cd DiscordBotApp/ (or cd <yourdirname> if you titled it something different). Once in the directory, run the command npm init which will initialize the node package manager and create a package.json file where we can see dependencies. Upon running this command, you will be prompted to perform some configuration. You may copy this configuration for the time being (And replace author with your name). The entry point is named after what we will call the JavaScript file – in this case, bot.js:

Hit enter and we can now install the discord package.
Now, let’s run the command npm install discord.js –save.
![]()
What this will do is install the discord.js package which we can then use in our app. The –save option will save discord.js to our package.json file and list it as a dependency:
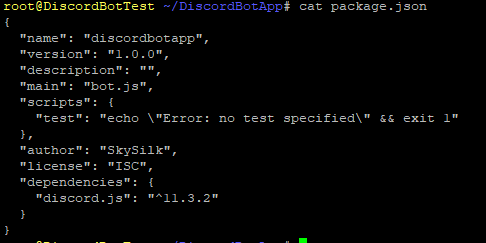
After running the install, we can now see “discord.js” listed as a dependency.
Great! We can now move onto programming the bot itself.
Part 3. Programming the Discord Bot
Now that we have our Node.js server set up with the proper packages, let’s go ahead and write the code that will tell the bot what to do. Keep in mind, there are many ways you can add the JavaScript file onto your server. For the following, section I will simply be using Sublime text (a light-weight text editor) and FileZilla to transfer the file onto the Node server. Again, you can do this anyway you’d like, so long as the syntax is correct.
The JavaScript Code
Now let’s program the bot. Open up your text editor and type in the following script. Here is what the js script will look like:
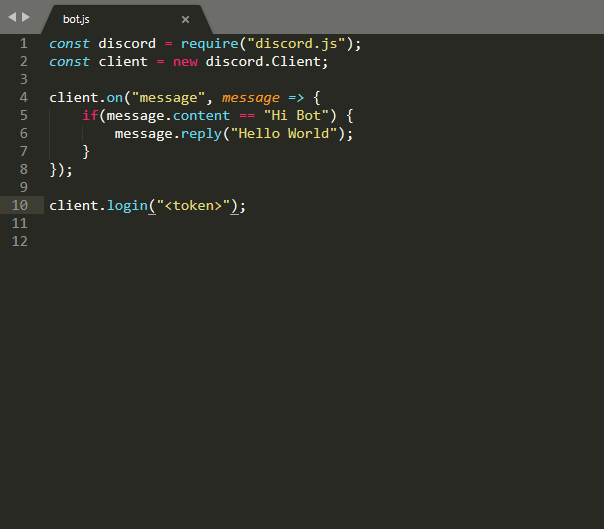
If you don’t have any programming experience that’s completely fine. All that’s going on in our JavaScript here is we are defining two variables, discord and client. In Node, we have to “require” packages in order to use them in our applications, which is what we see here with discord. In this case, we require discord.js which is the package used to build bots.
And, if you’re feeling a tad lazy, here’s a pastebin so you can simply copy-paste the code. However, keep in mind that “<token>” is not written literally, but will be your unique token provided by Discord.
The discord variable is then used to create a new variable “client” using the .Client method of the discord.js package. The client.on method is where the actual functionality of the bot is scripted. In this case, if a user types “Hi Bot”, then the bot will respond “Hello World”.
P.S. If the script is confusing in any way or you’d like to learn more about discord.js and how to tell the bot to perform other functions, the documentation can be found here.
Adding the Bot User Token
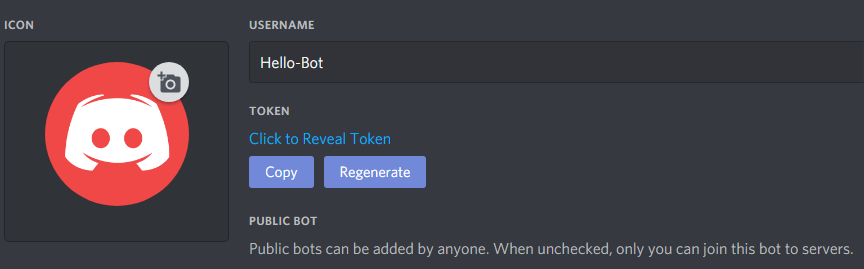
In the line client.login(“<token>”);, this is where you will put your token. To reveal your token, go back to the discord app page, click the “Bot” tab on the left-hand menu and select “Click to reveal” under token:
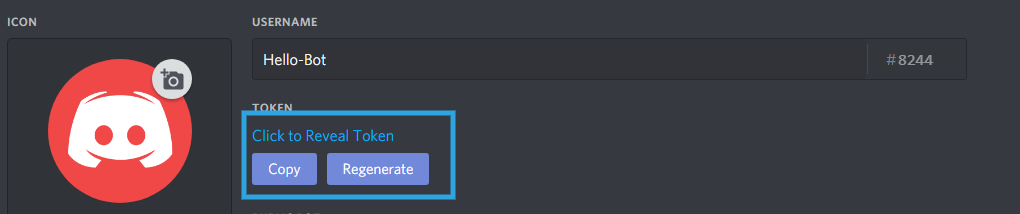
Copy and paste the token into the script where it says “<token>” between the quotation marks.
P.S. – DO NOT share your secret token with anyone else as someone who has access to this can control your bot and its permissions outside of your control. If you suspect that someone has gotten a hold of your token, you can always select “Regenerate” in order to generate a new token. If you do this, remember you’ll need to change your JavaScript file to contain the new token.
Transferring the JS File onto your VPS
After we write the script, we’ll have to transfer the file into the DiscordBotApp directory onto our server. I will demonstrate this using FileZilla, a free FTP solution. If you don’t already have FileZilla, you can download it here.
Now lets fire up FileZilla. At the top of the program, lets connect to our VPS using the listed parameters:
![]()
Host: Your server IP
Username: root
Password: Your server password (set up during the VPS configuration)
Port: 22
You’ll now see all of the folders listen on your VPS. Navigate to where you save the JavaScript code on your local machine and drag that into the DiscordBotApp (or whatever you have called this) directory.
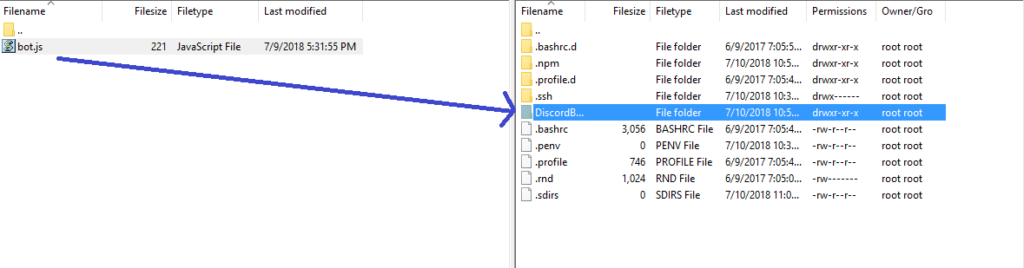
The bot.js JavaScript code was transferred into the DiscordBotApp directory on the Node VPS
Check to see if the file successfully made it onto the VPS using a simple ls command:
![]()
As we can see, the bot.js file is now on the server.
Part 4. Finalizing the app for Discord Bot
Now before moving on to finishing up, let’s first authorize our bot. Head back to discordapp.com/developers/applications to find your app. Go into that left-hand menu where you found the Bot tab and now hit “OAuth2”.
Generating an OAuth2 URL
Here, you’ll see a box down below labeled “Scopes”. Select “bot” and you’ll notice an authorization link generate which is already pre-filled with your Client ID.
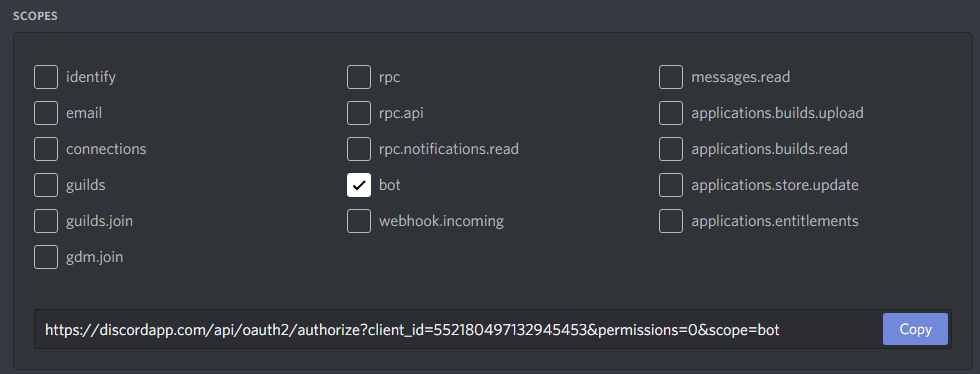
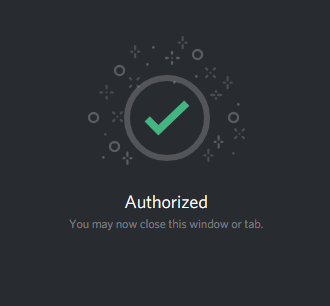
Copy and paste this link into your address bar. Once there, you’ll get another popup window where you can select the server in which to add your bot. Simply add the server (create one on your Discord account if you haven’t already done so) and hit Authorize.
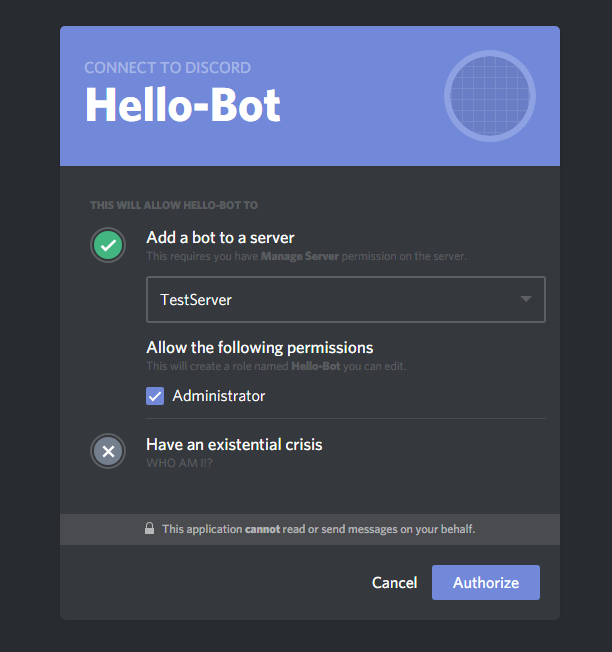
After hitting authorize you should then get a confirmation message that says “Authorized”
If everything went swimmingly (which it should have) then you’ll now be greeted with this and you’re ready to move on to setting up your Discord bot VPS and programming the bot itself!
Part 5. Start the Discord bot VPS and Talk with it!
We came here to learn how to host a Discord bot and we can finally begin to interact with it!
UPDATE: Start with PM2
Pm2 is a popular process manager for node apps which also contains a built-in load balancer. With pm2, you will be able to run your bot forever without any downtime for system tasks.

In order to install pm2, we can use the node package manager (npm) in our terminal. Simply type the following command:
npm install pm2 -g
The -g flag will install pm2 globally rather than just within your project.
In order to start your bot, simply run the following command within the folder where your bot.js file is located:
pm2 start bot.js
And voila! Your bot is now online. To run your bot using the traditional node method, keep reading.
Starting the Node Server and Bot App
Start the node server so we can talk to our bot. To do this, head back into your SSH console and type the following command (Make sure you’re in the directory in which you put the bot.js file)
node bot.js
![]()
If there are no errors, that means the server and app are running.
Go into the Discord desktop app and test the bot out! You can verify that your bot is online by the green circle next to its image in the server itself.
Make sure to go into the server in which you added the bot and type in exactly what you wrote within the if statement in the JS file:

As we can see, our bot is now working! You’ll also notice that if your node server is no longer running, the bot will not work. Make certain that your server is listening in order to keep the bot functioning.
Conclusion: Final Thoughts when hosting a Discord Bot
As stated previously you can use your Discord bot VPS to automate virtually any server task so long as it is up and running. Additionally, SkySilk has a Discord server available for users to come share their projects, ideas, suggestions, or just hang out with like-minded individuals.
Additionally, you can also read up on hosting a Discord bot from the official Discord developer documentation page.
What will you use a Discord bot for? Join our server and share!
Use promo code “SKY95DISCORD” to save 95% off your first month. Offer is valid for new users only.
ALSO RELATED:


