
Building a real-time chat application is a common goal for people who are just beginning to dive into the wonderful world of software development. It makes sense–once you understand how to exchange messages between a node js chat server and clients, a lot of doors open up. You can build social networking platforms, messaging applications, and even multiplayer games. In this post, we will explore how to create a real-time chat app with Node.js.
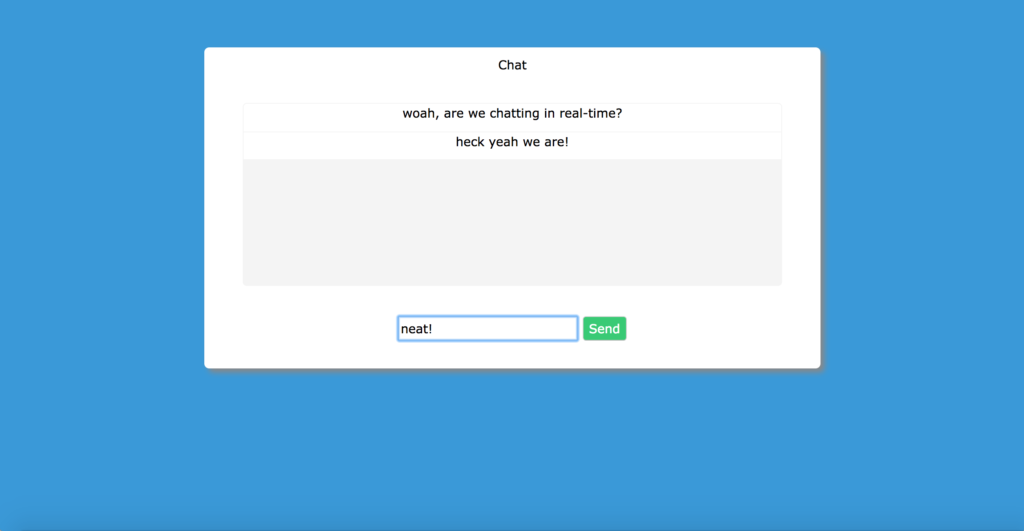
We are going to build a web app so that anyone who visits our domain or IP address will be able to jump in and start chatting. By the end, we will have a web page with real-time chatting that we can access just by navigating to an IP, and it will look like this:
The skills we build here will enable us to branch out to all sorts of other projects, and we will use the code from this post to write other exciting posts in the future!
Note: This tutorial assumes you are comfortable with navigating the command line of a VPS and basic HTML/CSS.
How to Create A Real-Time Chat App with Node.js: Application Checklist
Okay, so we’ve decided we want to learn how to create a real-time chat app. How in the world are we going to accomplish that? Let’s start by looking at what we need:
•A place to host our node js chat server. Luckily, SkySilk has a lot of great solutions for this requirement!
•Node.js: A javascript framework that will power our application
•Express: a Node.js web application framework
•socket.io: a javascript library that powers real-time web applications. It allows bi-directional communication between clients and servers using sockets
Now that we have a clear direction to go in, let’s set up our app hosting.
Discuss VPS management, development, apps and more on the Official SkySilk Discord!
To the Cloud: Setting Up The VPS
We are going to be hosting our chat app on a virtual private server hosted by SkySilk. For this tutorial, I am going to be using the Standard Nano plan, which checks in at a cool $5 per month. I recommend this plan because it is a good balance of specs and price. It has enough specs to not worry about resources while developing a few applications, and it can also handle inviting a few users to test with, all while costing just five bucks a month. In addition, SkySilk has a Node.js template if you would like to deploy a machine with Node already installed!
Once you have deployed your machine, log into it via SSH with your favorite terminal/client.
If you deployed a clean Linux OS, we will first need to install Node. If you used the SkySilk Node.js template, you can skip this step.
apt-get install node.js
Read Also: Node.js 10: Should You Upgrade?
We will also need the node package manager, so install it with this command.
apt-get install npm
Next, create a directory for your chat app and cd into it.
mkdir chat
cd chat
Create a new node project. NPM will take you through some steps, such as naming your project, giving it a version number etc.
npm init
Next, we need to add the dependencies we talked about earlier: express and socket.io.
npm install --save socket.io
npm install --save express
Now our app directory is set up and good to go, and we can get to coding!
Creating a Node Js Chat Server
The first file we need to create is our main app file. I will call mine app.js. Create a file called app.js and open it with a text editor. Let’s do some basic setup.
var express = require('express');
var app = express();

var server = require('http').createServer(app);

app.get('/',function(req, res) {
	res.sendFile(__dirname + '/client/index.html');
});
app.use('/client',express.static(__dirname + '/client'));


console.log("Server started.");
Here we are telling our app to use express, starting our server, telling our app to use /client as the directory to serve pages from, and setting /client/index.html as the starting page for our app. This is a pretty standard setup for a Node.js app that uses express.
Next, let’s add the socket.io and basic chat functionality.
SOCKET_LIST = {};

var io = require('socket.io')(server);
io.sockets.on('connection', function(socket){

        console.log('new user!');
        var socketId = Math.random();
        SOCKET_LIST[socketId] = socket;

        socket.on('sendMsgToServer',function(data){

            console.log('someone sent a message!');
            for(var i in SOCKET_LIST){
            SOCKET_LIST[i].emit('addToChat', data);

            }

        });

        socket.on('disconnect',function(){

            delete SOCKET_LIST[socket.id];

	});

});

server.listen(4141);
Here, we designate several actions if a socket receives a certain event. Some of these event names are reserved by socket.io, such as ‘connection’. Others we have defined ourselves, such as ‘sendMsgToServer’. Let’s take a step by step look at what is going on here.
- When a socket connects, we define functions based on events or strings the socket receives
- Generate a random id when a user connects and add them to our socket list variable
- Define a function when the event ‘sendMsgToServer’ occurs, which loops through our socket list and sends the message to every connected socket with our ‘addToChat’ event
- When a socket disconnects, remove them from our socket list
- Finally, tell our app to listen on port 4141. Whatever port you choose, make sure it is open and not blocked by a firewall.
This provides us with a basic foundation for our node js chat server. Users can connect, send messages that will be sent to every connected user, and we track when someone disconnects. Congrats, you’ve completed the first major step in learning how to create a real-time chat app!
Save and exit out of editing your app.js file. Start your app by running this command in the project directory.
node app.js
Your program is now running and ready for users! Users can access your app by navigating to :4141, or whatever port you are using. Next, we need our HTML page that will be served to the user. Exit out of your running app with ctrl+c and return to your project directory.
A Real-Time Chat App Web Page
Create the subdirectory ‘client’ in your project directory. Then cd into it and create a page called ‘index.html’. Add the following lines of code to the file.
We have added the script references we need in order for the page to function, and set up some basic HTML elements to display to the user. It isn’t going to do much in its current state though, so let’s fix that!
Add the following lines of code to the index.html file.
We just made two major additions with this code. The first addition is that our page now responds when its connected socket receives an ‘addToChat’ event. It takes the data, creates a new instance a chatCell class, and adds it to the chat scroll view.
The second addition is we respond when a user submits a message. We first prevent the page from refreshing via form submission. Then, we emit the event ‘sendMsgToServer’, with our chat input’s text value as an argument. Our app.js file will then receive the message and send it to all connected sockets via the work we put in earlier. We also clear the form text so the user doesn’t have to backspace to type a new message.
So we can now send and receive messages, but we can definitely add some quality of life improvements. Add this code to your
That's everything we covered in this tutorial code-wise. But this is really just the beginning! You've learned how to create a real-time chat app with Node.js, but there is so much more you can do with this knowledge.
How to Create A Real-Time Chat App: Final Overview
In this tutorial, we set up a basic node js chat server that we can use just by navigating to an IP address. There are tons of additions and improvements that can be made to this, such as:
- prompting users to create a username to distinguish users
- private messaging based on socket id
- creating a database for users to register and chat with claimed usernames
- displaying the total number of users, and adjusting when someone joins or disconnects
- customize the look and make it your own!
The cool thing about this tutorial is that is is a building block for endless possibilities. You can extend this app to become a social site, multiplayer game, polling system, whatever you can dream of essentially. If you are looking for a community of like-minded people interested in how to create a real-time chat app or other content alike, feel free to join the official SkySilk Discord Channel. This tutorial has reached its end, but you can expect SkySilk to build upon this tutorial and create some cool apps by building on this very code. Happy coding!
More development tutorials you may like:


